Description
Protect your vehicle’s battery and prevent unwanted power drain with the 12V/24V Remote Control Battery Disconnect Switch Relay. This smart device allows you to remotely turn your car battery on or off with a simple press of a button — no need to manually disconnect cables.
Designed for cars, trucks, RVs, boats, and other 12V/24V systems, it helps extend battery life and ensures safety during long periods of non-use. The wireless control system makes operation quick and convenient, while the heavy-duty relay ensures stable and reliable performance.
Key Features:
-
Remote control battery switch for 12V/24V vehicles
-
Effortlessly turn battery power on/off from a distance
-
Prevents battery drain and leakage during storage
-
Strong relay design ensures stable current and durability
-
Suitable for cars, trucks, RVs, boats, and machinery
-
Easy to install and operate
Installation Process for 12V/24V Remote Control Battery Disconnect Switch
⚠️ Important Note:
It is recommended to connect the switch to the battery’s negative terminal.
If there is no available position on the negative side, connect it to the positive terminal instead.
Step 1 – Prepare the Battery Connection
-
Turn off the vehicle power completely.
-
Remove the buckle (clamp) from the negative pole of the battery.
-
(If installing on the positive pole, remove it from the positive side instead.)
-
Step 2 – Install the Main Unit
-
Refer to the installation diagram on page 1 of your manual.
-
Place the two copper plates together and secure them to the battery terminal clamp.
-
Ensure firm contact between the copper plates and terminal for efficient power flow.
-
Mount the battery power-off switch unit securely near the battery.
Step 3 – Connect the Wires
-
Attach the switch leads to the battery following the polarity diagram:
-
Red wire → Positive pole (+)
-
Black wire → Negative pole (–)
-
-
Ensure all terminals are tight and secure.
-
Double-check that the relay module and socket connections are properly aligned.
Step 4 – Test the System
-
Use the included remote controller to test functionality:
-
Press the “ON” button to activate (power on) the battery.
-
Press the “OFF” button to cut off (power off) the battery.
-
-
Verify that the vehicle starts normally when powered on and that the circuit is fully disconnected when powered off.
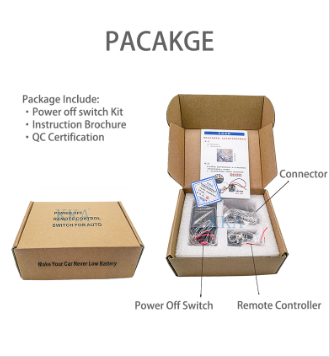
Included Components
(As shown on page 3 of the manual)
-
1 × Battery Power-Off Switch Unit
-
2 × Remote Controllers
-
1 × Positive Metal Clamp
-
1 × Negative Metal Clamp
-
2 × Copper Plates
-
1 × Red Positive Wire & 1 × Black Negative Wire
-
1 × Pair of Red and Black Nuts
Safety Tips
-
Disconnect the vehicle’s battery before installation to avoid short circuits.
-
Ensure good contact between the copper plates and the terminal clamp.
-
Avoid placing the control unit near heat sources or moving parts.
-
Test the remote range before closing the bonnet.
-


